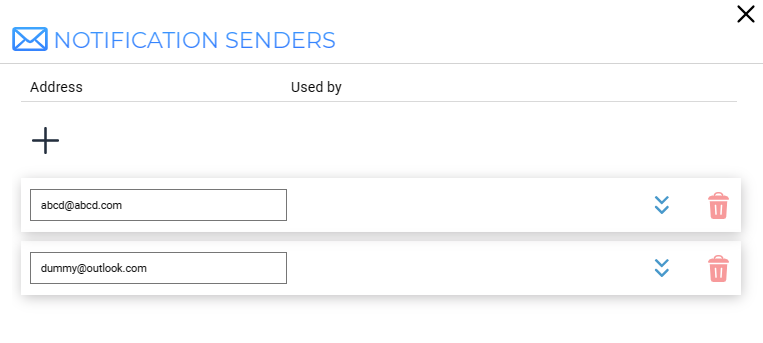
The Notification Senders dialog allows you to configure email accounts within DTS, which can then be used to send Project Notifications.

Notification Senders Dialog
Add a new Notification Sender
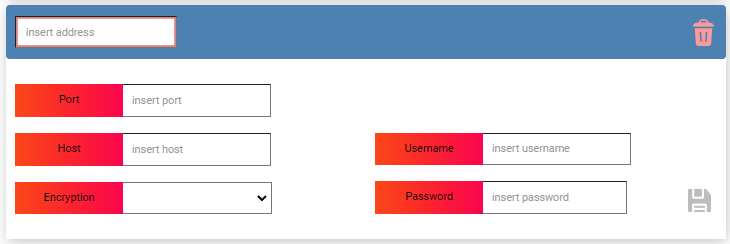
To add a new Notification Sender, begin by clicking the Add button . This will reveal the Add new Notification Sender section.

Add new Notification Sender
The dialog contains the following fields:
[Notification Sender] Address |
The email address of the account (this will double as the identifier for the sender within DTS). |
Host |
The SMTP server hostname. |
Port |
The SMTP server port. |
Encryption |
The type of encryptions to be used (none, SSL, STARTTLS) |
Username |
The SMTP username. |
Password |
The SMTP password. |
To save an entry, click the Save button.
![]() The save button will only become available when all the fields are filled.
The save button will only become available when all the fields are filled.
![]() Only one sender can be configured for any given email address.
Only one sender can be configured for any given email address.
Edit a Notification Sender

To edit an existing Notification Sender click on the respective row to view its details.
If a field has been modified, the corresponding label will turn green.
If some of the fields are empty or have incorrect values, their respective labels will turn red and the save button will be disabled.
The fields that contain the initial value will have a blue label.
To save your changes, click the Save button.
![]() The save button will only become available when all the required fields are filled.
The save button will only become available when all the required fields are filled.
To delete an entry, click the Delete button.